使用git pages在github搭建你的个人文字托管仓库。
参考:傻瓜都可以利用github pages建博客 可选模板:Jekyll Themes 选取的模板样式:Cool Concise High-end
方法一
放入模板后的文件夹
从github上克隆下来后,将文件夹下的除了.git文件外,全部删除。放入Jekyll的模板。
-
index.html:这是你博客的主页面,里面的内容就是你的主页了
-
_config.yml:这是你博客的基本配置文件,里面有你博客的名字,以及存放博主的一些基本信息
-
_layouts:这文件夹里面存放你每个页面的设计,一般有default.html(默认页面)和posts.html(博文页面)
-
_includes:这个文件夹里的的内容将会通用到你博客每个页面,起到一种便利的作用
-
_posts:这里面装的就是你的博文啦,记住,要用markdown语法写,要不上传会失败的。
写博文
在_posts中写博文,然后打开github软件,看到changes即为本地文件发生改变数目的情况,在“summary”随便写串东西记录一下,然后按“commit to master”,等“Sync”出现数字后,你就戳那里同步到github吧!
查看blog
浏览器输入https://zam121118.github.io
就可以看到你的博文啦!!!(开心)
为自己blog添加自定义custom domain(待写)
方法二:使用github项目安装
github地址及说明:Gaohaoyang/gaohaoyang.github.io
windows安装ruby 和 jekyll
注册多说评论系统
duoshuo:shortname:amyblog
| 名称 | maorongrong |
|---|---|
| 密码 | 常用的 |
| 邮箱 | QQ邮箱 |
| 网站 | github个人博客 |
百度统计分许ID
| 用户名 | amyblog |
|---|---|
| 密码 | 常用的 |
| 邮箱 | QQ邮箱 |
| 网站 | github个人博客 |
生成如下的个人标示:
hm.src = "//hm.baidu.com/hm.js?xxxxxxxxxxxx"即xxxxx字符串
<script>
var _hmt = _hmt || [];
(function() {
  var hm = document.createElement("script");
  hm.src = "//hm.baidu.com/hm.js?5eee93cbacd99ad9c8333398cdabeb53";
  var s = document.getElementsByTagName("script")[0];
  s.parentNode.insertBefore(hm, s);
})();
</script>
在_ports中写博文
post文章头格式参考: YAML Front Matter

_posts This folder contains your dynamic content/posts. the naming format is required to be @YEAR-MONTH-DATE-title.MARKUP@.
- post文章格式
A post must have a valid filename in the form YEAR-MONTH-DATE-title.MARKUP and be placed in the _posts directory. If the data format is invalid Jekyll will not recognize the file as a post.
The date and title are automatically parsed from the filename of the post file. Additionally, each file must have YAML Front-Matter prepended to its content.
YAML Front-Matter is a valid YAML syntax specifying meta-data for the given file.
_posts目录下存放文章信息,文章头部注明 layout(布局)、title、date、categories、tags、author(可选),如下:
---
layout: post
title:  "对这个 jekyll 博客主题的改版和重构"
date:   2016-03-12 11:40:18 +0800
categories: jekyll
tags: jekyll 端口 markdown Foxit RubyGems HTML CSS
author: Haoyang Gao
---
- 产生目录时使用
* content
{:toc}
- 隔离摘要
4次换行为摘要分割符,换行前的内容会以摘要的形式显示在主页Home上,进入文章页不影响。 换行符的设置见配置文件_config.yml的 excerpt,如下:
# excerpt
excerpt_separator: "\n\n\n\n"
使用 markdown 语法写文章。
更改Jekyll服务端口
更改为服务端口1234
# port
port: 1234
本地执行
进入本地github博客仓库
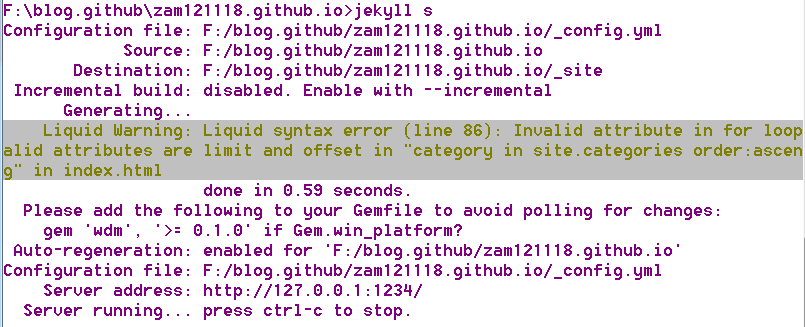
在博客目录下执行jekyll s启动jekyll渲染服务
访问自己的博客
输入http://127.0.0.1:1234/
其他更改
修改网站ico
在bitbug在线生成你的网站小ico(16X16 is okay)。
forkHyG博客模板,在_includes目录下的文件中更改你自己的ico名称,例如我的:
<link rel="shortcut icon" href="/myfavico.ico?" type="image/x-icon">
<link rel="icon" href="/myfavico.ico?" type="image/x-icon">
<link rel="stylesheet" href="/css/fontawesome/css/font-awesome.min.css >"
将myfavico.ico换成你的名字。